Making connections
MoIP amplifiers are designed to operate as part of a MoIP system, requiring a physical connection to a network as well as physical connections to any external audio sources.
Caution: Connecting speaker wires or input cables while the amplifier is powered may cause electrical shock and could damage the amplifier. Unplug the amplifier and the devices associated with it.
Avertissement: Les fils se reliants de haut-parleur ou les câbles entrés tandis que l’amplificateur est actionné, peuvent causer le choc et pourraient endommager l’amplificateur. Débranchez le cordon de secteur avant d’établir des rapports.
Network connection
Connect an Ethernet cable (preferably CAT-6E or better) to the amplifier’s Network port from a local network connection.
If the amplifier is part of a MoIP system, be sure to connect the amplifier to the same switch as the other MoIP components in the system.
Inputs
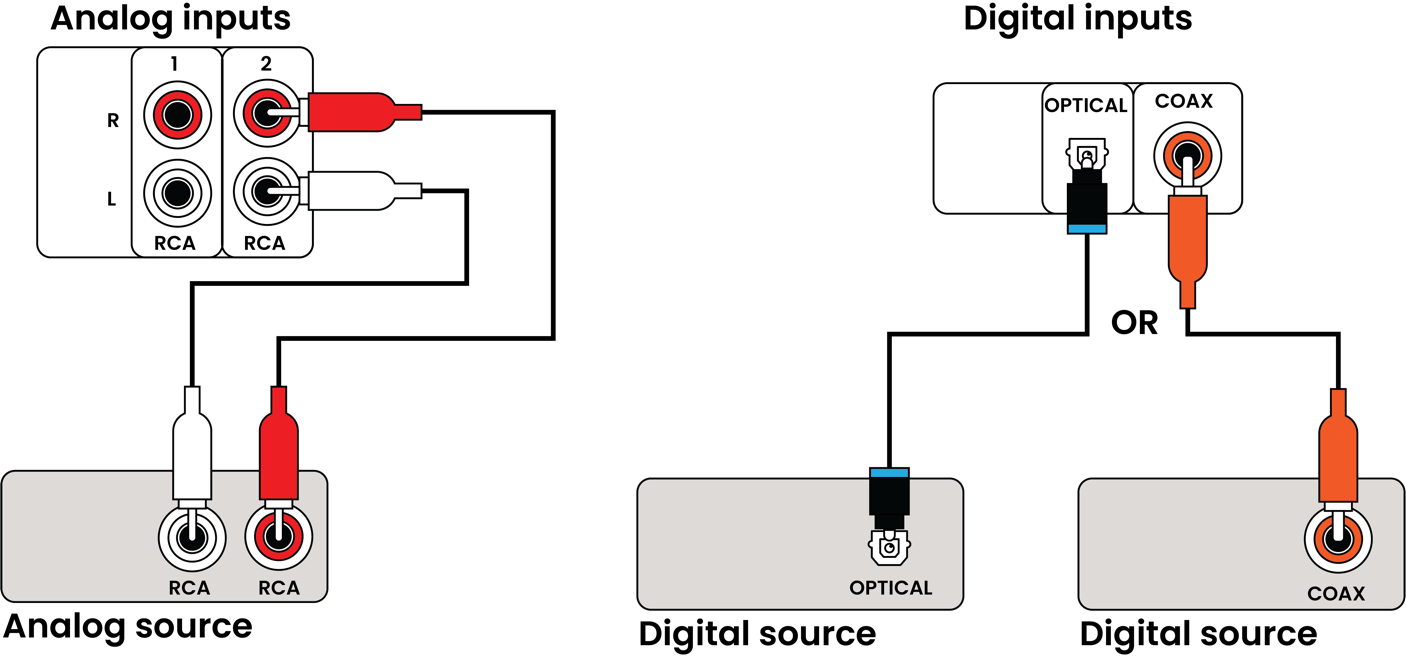
For line-level connections, use high-quality RCA cables that feature low impedance, shielding, and high-quality connectors.
Note: The coax and optical inputs are parallel, so only one can be used.
Speaker outputs
Use 14-18 gauge stranded two-conductor loudspeaker wire for all speaker-level connections.
-
At each speaker-level connection, ensure that at least 2" of each conductor is separated.
-
Strip away 1/4" of insulation from each conductor.
-
Connect the appropriate conductor to the speaker connection, observing correct polarity.
Below is a wiring example for a MoIP amplifier with configured zones.

5.1 Zone with Passive Sub
Channel 1: Front Left Speaker
Channel 2: Front Right Speaker
Channel 3: Center Speaker
Channel 4: Surround Left Speaker
Channel 5: Surround Right Speaker
Channel 6: Subwoofer
5.1 Zone with Powered Sub
Channel 1: Front Left Speaker
Channel 2: Front Right Speaker
Channel 3: Center Speaker
Channel 4: Surround Left Speaker
Channel 5: Surround Right Speaker
Sub Out: Subwoofer
4.1 Zone with Passive Sub
Channel 1: Front Left Speaker
Channel 2: Front Right Speaker
Channel 3: -
Channel 4: Surround Left Speaker
Channel 5: Surround Right Speaker
Channel 6: Subwoofer
4.1 Zone with Powered Sub
Channel 1: Front Left Speaker
Channel 2: Front Right Speaker
Channel 3: -
Channel 4: Surround Left Speaker
Channel 5: Surround Right Speaker
Sub Out: Subwoofer
3.1 Zone with Passive Sub
Channel 1: Front Left Speaker
Channel 2: Front Right Speaker
Channel 3: Center Speaker
Channel 4: Subwoofer
3.1 Zone with Powered Sub
Channel 1: Front Left Speaker
Channel 2: Front Right Speaker
Channel 3: Center Speaker
Sub Out: Subwoofer
3.0 Zone
Channel 1: Front Left Speaker
Channel 2: Front Right Speaker
Channel 3: Center Speaker
2.1 Zone with Passive Sub
Channel 1: Front Left Speaker
Channel 2: Front Right Speaker
Channel 3: Subwoofer
2.1 Zone with Powered Sub
Channel 1: Front Left Speaker
Channel 2: Front Right Speaker
Sub Out: Subwoofer
2.0 Zone
Channel 1: Front Left Speaker
Channel 2: Front Right Speaker
Note: The Sub Out number corresponds to the zone number. For example: For the second zone configured (Zone 2), the subwoofer connects to Sub Out 2.)
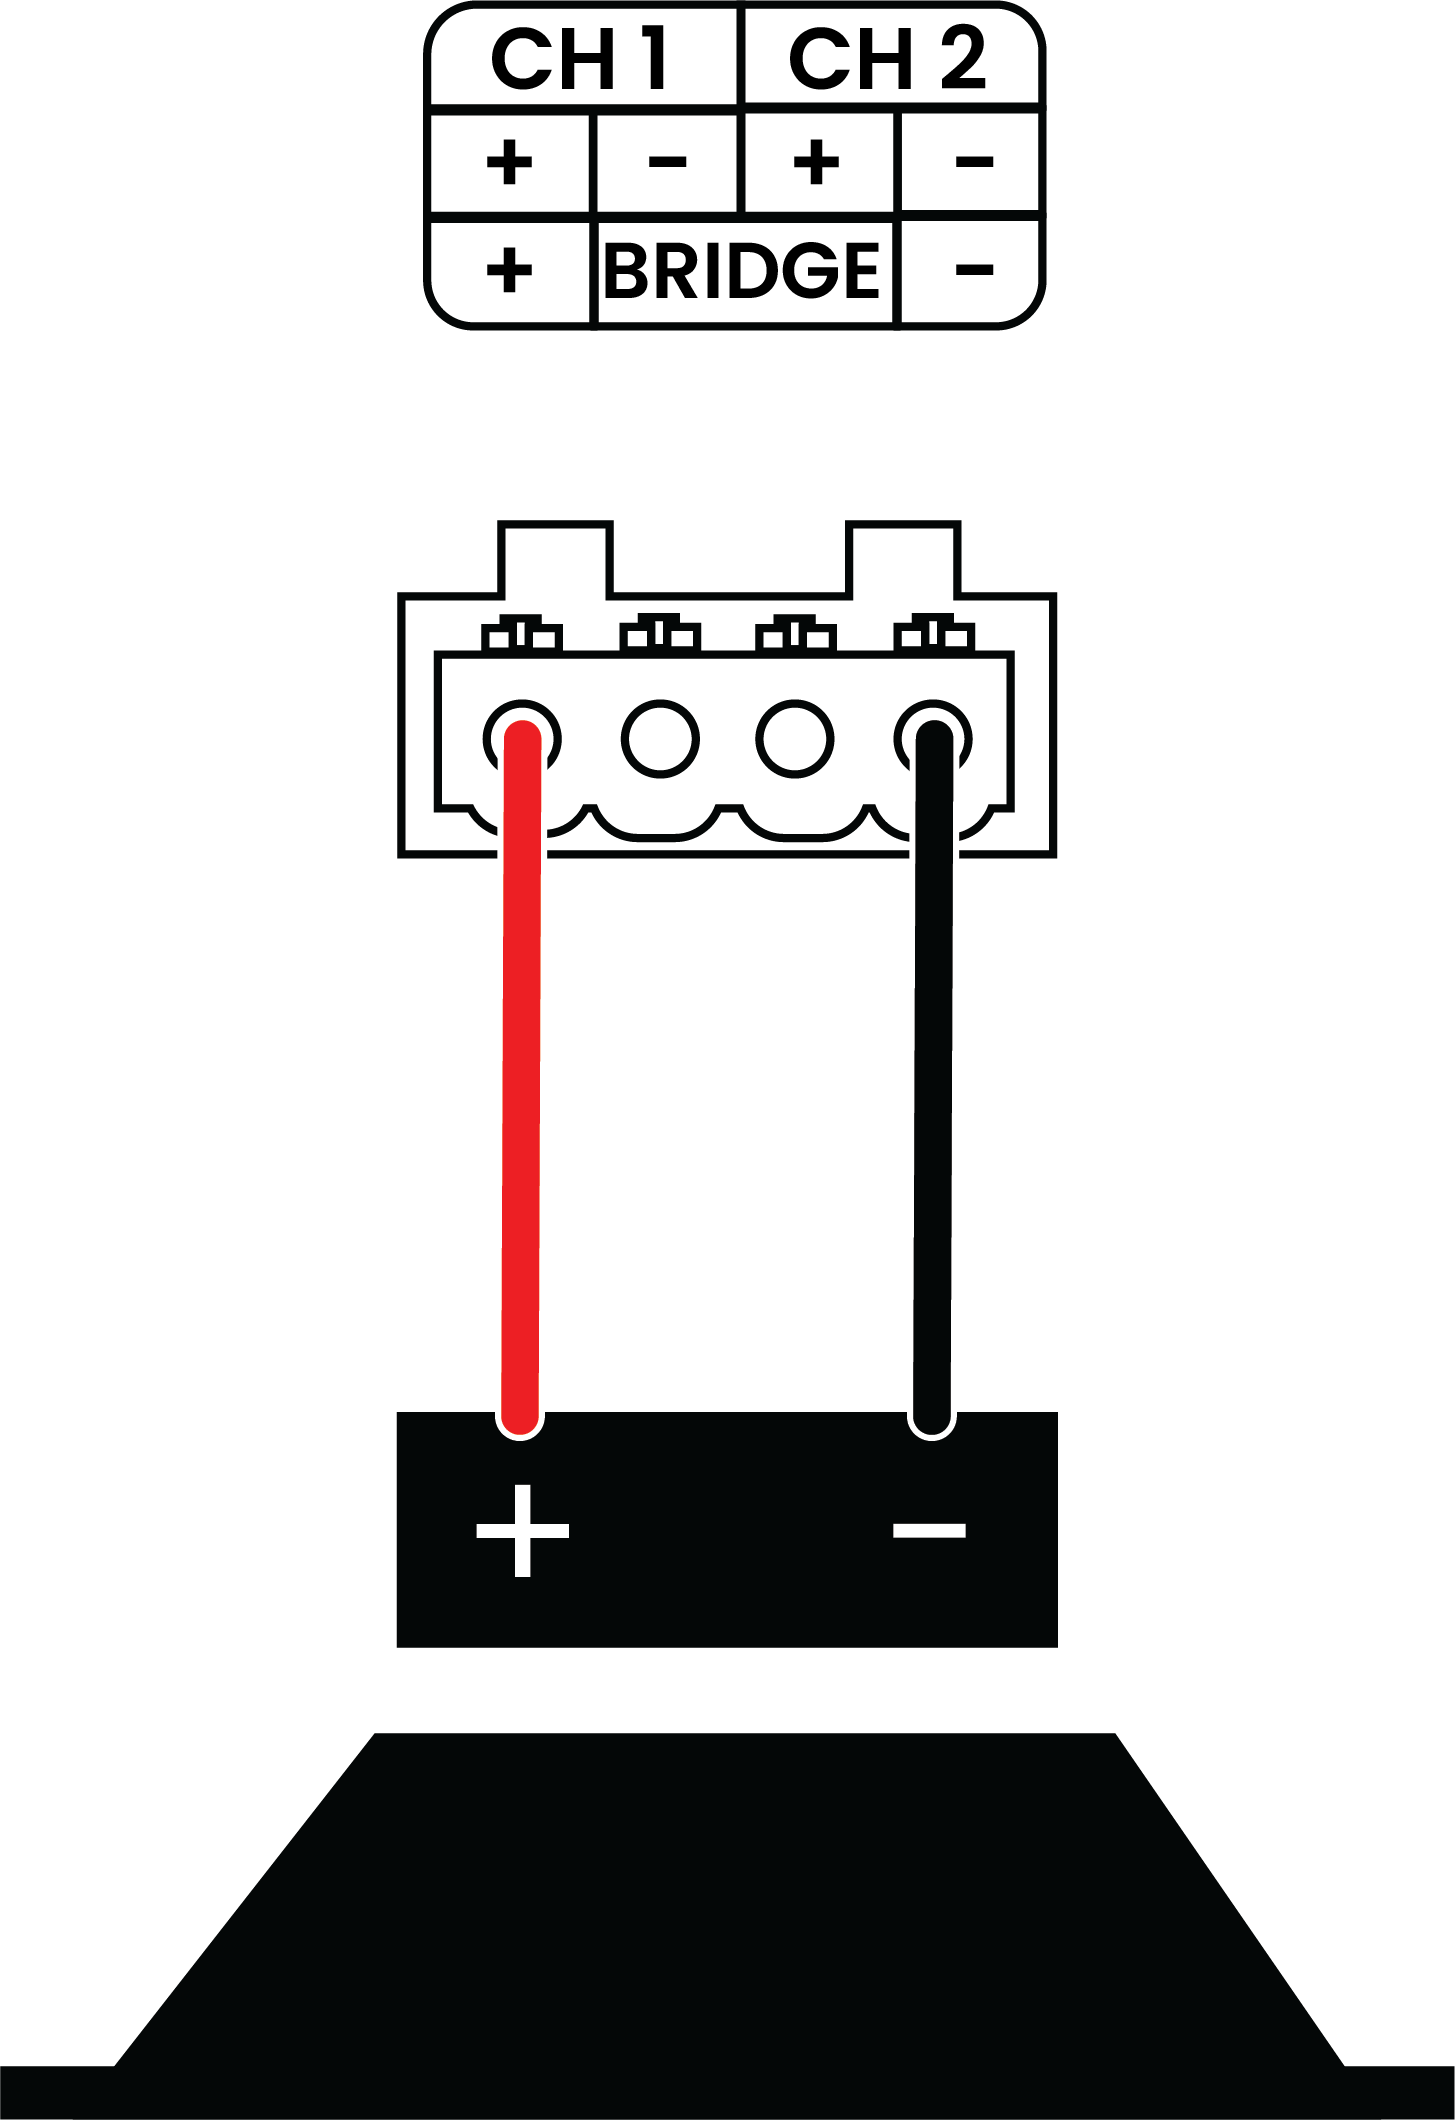
Bridged speaker outputs (EA-MOIP-AMP-12D-100 Only)
Use the positive connection from the right channel and the negative connection from the left channel to bridge the speaker output for each zone. This creates a single speaker (mono) output.
Note: Output bridging is only available on the EA-MOIP-AMP-12D-100 model.
Subwoofer outputs
Use a mono RCA cable to connect a subwoofer amplifier or powered subwoofer to a zone.
The Sub Out is a summation of the corresponding zone’s source input and has user-adjustable crossover in the configuration UI. If the subwoofer amplifier or the powered in-room subwoofer also has a crossover, set it as high as possible when using the amplifier’s built-in crossover.
Note: In zones configured as “x.1” (active or passive subwoofer), any input is sent to the zone’s subwoofer output, even if the source material does not have a native LFE or subwoofer channel.
Power
EA-MOIP-AMP-12D-100
Connect the provided power cable to the amplifier’s power input and a power outlet. When the power cable is connected, turn on the power switch.
EA-MOIP-AMP-6D/3D-50
Connect the amplifier to a PoE enabled network switch or PoE injector via CAT5 cable or better. If installing in a system where no PoE source is available, you can use the EE-PS-48VDC-2.5A external power supply.